AI Tools — Cloud HD

Increase image resolution with AI

The photo is right; the pixel count is not — the print shop wants 3000 pixels and you have 900. Upload it and our GPU returns it at four times the width and height with reconstructed detail, not stretched blur.

Increase image resolutionPro · runs on our GPU
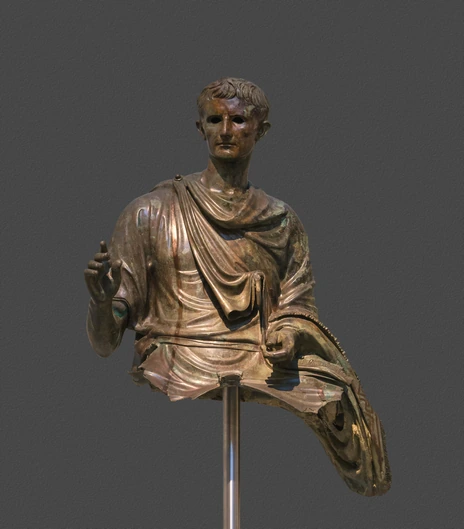
Bronze statue of Augustus, small source photograph before enhancement
Sample — processed with hat-l-x4 2324beea23b0

How it works

  1. Pick the photo whose resolution needs raising — up to 4 megapixels in, sixteen times the pixels out.
  2. It goes to our GPU for this one run, and nothing is kept afterwards.
  3. Download it at four times the width and height. This is an HD run: one of the 10 in your monthly allowance.

The file is uploaded for this run only, deleted on completion, and never used to train anything. This page is the AI photo enhancer, tuned to the arithmetic of resolution and print.

All Image Tools

Solutions by use case

Increase Image Resolution — Free, Fast & Private

Resolution problems are arithmetic problems, so start with the numbers. Prints want about 300 pixels per inch. Screens want whatever the layout says, plus double for high-density displays. Multiply the size you need by the density it wants, and you have a pixel target; your file either meets it or it does not. When it does not, you have two honest options: print smaller, or create real pixels — and creating them well is precisely what a server-grade reconstruction model is for. What never works is the DPI-metadata trick: relabelling 72 DPI as 300 DPI moves numbers in a header while the print stays exactly as coarse as before.

4x each side is more headroom than it sounds. A 900x1200 web export becomes 3600x4800 — an 8x10" print at 300 DPI with margin to spare. A 2000x1333 camera crop becomes 8000x5332, poster-sized. That is why the intake cap of 4 megapixels rarely pinches: sources above it are almost always print-ready already, and the cap is what keeps the 16x output inside what a GPU can reconstruct with genuine care rather than speed-blur.

Prepare on your device, reconstruct on ours, finish on yours. Crop to the final composition first with the on-device crop tool — pixels spent on scenery you will trim are pixels wasted. Then one enhancement run, encrypted in, deleted on completion. Then any format conversion or compression for delivery happens back on your device. Only the middle step ever sees our server.

The cost, in plain numbers. Each run spends one cloud run from your Pro allowance (150 a month on Monthly, 200 on Annual) and one of the month’s 10 HD runs — both meters are shown before every run and on your account page. Refused and failed runs charge neither. And when the job is screen-bound and ordinary, the free on-device upscaler does it with no upload at all.

How it works

  1. Do the print arithmetic: Target inches x 300 = the pixels you need. Compare against your file to see if 4x closes the gap.
  2. Upload the image: JPEG, PNG or WebP, up to 25 MB and 4 megapixels. Pro accounts see the upload button; the file travels encrypted.
  3. Let the model build the pixels: HAT-L reconstructs at 4x each side on our GPU. It scales with the photo — roughly a minute per megapixel, so a 4 MP source is a three-to-five-minute run; the progress bar says so before you wait. Soft or noisy source? Run the enhancer first, then upscale the clean result.
  4. Download and print at 300 DPI: The PNG comes back at 16x the pixels. Set your print software to the physical size; the resolution is now there to support it.

Frequently asked questions

How much resolution do I need for printing?
The working rule is 300 pixels per inch of print. A 4x6" print wants 1200x1800 pixels; an 8x10" wants 2400x3000; an A3 poster around 3500x5000. Multiply your target inches by 300 and compare against your file — the gap is what this tool closes, at exactly 4x each side per run.
What is the difference between resolution and DPI?
Pixels are what the file has; DPI is how densely a printer lays them onto paper. Changing a DPI number in metadata adds nothing — 1000x1500 pixels stays 1000x1500 pixels. Genuinely increasing resolution means creating new pixels, which is what the AI model does, with reconstructed detail rather than the soft blur of plain resampling.
Why is the input capped at 4 megapixels?
Because the OUTPUT is what our GPU pays for: 4 MP in becomes 64 MP out — already poster territory. If your source is larger than 4 MP, it usually does not need AI enlargement; if you specifically need it bigger still, resize down on your device first and let the model rebuild from there.
Is one pass of 4x the maximum?
Per run, yes — each side exactly 4x. In practice one pass covers almost every print target when you start from a reasonable source. Running the output through again is possible but each run spends one of your HD runs, and reconstruction stacked on reconstruction drifts further from the original — use it deliberately.
Does my image stay private?
The photo is uploaded encrypted for this run only, processed once on our GPU, deleted within 24 hours of completion — and never used to train anything. For everyday enlargement with no upload at all, the free on-device upscaler is the sibling tool.